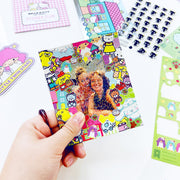
How to use your May Stationery Box
**If you haven't already...JOIN THE CLUB! A monthly sticker dream pack, delivered straight to your door!**
Alright, fellow stationery hoarders, it’s time to put that adorable May stationery box to work. Sure, we could just admire our perfectly curated collection of stickers, notepads, and washi tape, but today? Today, we craft. And not just any craft—a DIY Sticker Scene Viewer that turns your sticker stash into a tiny, rotating world of magic.
Grab your May stationery box and let’s get started.
What You’ll Need
-
A toilet paper roll (or paper towel roll, if you’re feeling ambitious)
-
White paper (not cardstock)
-
Black pen & pencil (for all that meticulous tracing)
-
A plastic straw (the hero of this story)
-
Scissors (because precision is key)
-
Hot glue gun (cue dramatic crafting music)
-
Your sticker collection! (We're using the Tinytown isometric stickers for this!)

How to Make Your Mini Sticker Scene Viewer
Step 1: The Paper Roll Glow-Up
That sad, empty toilet paper roll? We’re giving it a makeover. Wrap it in white paper, securing it like a tiny burrito of potential. Then, hot glue your plastic straw to one side—this will be the magic mechanism that makes the whole thing spin.
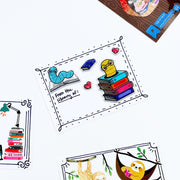
Then using the Kawaii Planner Sticker Pad we used the border stickers to embellish the outside! SO cute.


Step 2: The Sticker Scene Base
-
Trace three circles on a sheet of white paper, placing them side by side so they overlap a little, forming a rounded triangle.
-
Cut a tiny hole right in the center where all three circles meet. This is where your straw will poke through.
-
Cut out the entire shape in one piece—think of it as a three-lobed clover or an oddly satisfying fidget spinner.


Step 3: Sticker Scene Magic
Time to decorate!
-
Each of the three circles will be a different scene.
-
Use your isometric stickers to build tiny sticker worlds—we chose a post office, craft room, and bakery because, obviously, tiny pastries and tiny crafting supplies are life.
-
Let the sticker-placing joy commence.

Step 4: Assemble & Rotate!
-
Poke the plastic straw through the hole in your sticker scene base. This will let it spin like a tiny, magical diorama.
-
Stick the straw through the toilet paper roll, so when you peer inside, a scene appears. Rotate it, and—boom!—a new scene slides into view.
-
Trim off any extra length from the straw.
-
Hot glue a small piece of paper to the end so your scenes don’t go flying off into the crafting abyss.

And Just Like That… You’re an Inventor 🎉
Look through your DIY Sticker Scene Viewer, turn the paper on the straw, and voilà—your stickers just got an interactive upgrade. Who needs digital screens when you have the ultimate analog entertainment?
Now, go forth and make more tiny sticker worlds. Because clearly, we all need more of those. 💖


